
The 1000 Hour Eyebrow Tint is a popular, easy-to-use kit for achieving professional-quality brow and lash coloring at home, offering long-lasting results with proper application.
1.1 What is Eyebrow Tinting?
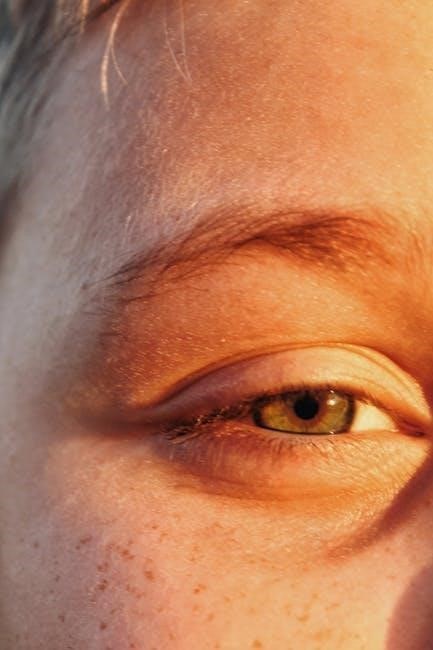
Eyebrow tinting is a semi-permanent cosmetic process that involves applying a dye solution to shape, define, and enhance the color of your eyebrows. It’s a quick, non-invasive treatment that stains the hair and skin beneath, creating a fuller, more defined brow. Unlike daily makeup, tinting lasts several weeks, depending on skin type and aftercare. The 1000 Hour Eyebrow Tint kit is designed for at-home use, offering a convenient way to achieve professional-looking results without frequent touch-ups.
1.2 Benefits of Using 1000 Hour Eyebrow Tint
The 1000 Hour Eyebrow Tint offers several advantages, including long-lasting results, water-resistance, and ease of use. Its formula ensures that the color stays vibrant for up to six weeks, reducing the need for frequent applications. The kit is designed for both brows and lashes, making it a versatile option. Additionally, it’s cost-effective compared to professional salon treatments, allowing users to achieve salon-quality results from home. The tint is smudge-proof and requires minimal maintenance, making it ideal for those seeking a low-effort beauty routine.

Pre-Application Instructions
Ensure a 48-hour patch test for skin sensitivity and prepare brows by removing makeup and natural oils to ensure proper adhesion of the tint.
2.1 Skin Sensitivity Test: 48-Hour Patch Test
Before applying the 1000 Hour Eyebrow Tint, conduct a 48-hour patch test to check for any allergic reactions. This step is crucial even if you’ve used similar products before, as sensitivity can change over time. Apply a small amount of the mixed dye behind your ear or on your wrist. Avoid washing the area and monitor for any signs of irritation, such as redness, itching, or swelling. If any discomfort occurs, discontinue use immediately.
2.2 Preparing Your Brows for Tinting
Preparing your brows is essential for a successful tinting experience. Start by cleaning the brow area with a non-oily cleanser to remove dirt, makeup, and natural oils. Gently shape your brows as desired before tinting to ensure the dye adheres evenly. Avoid using moisturizers or oils on or around the brows, as they can create a barrier. Ensure your skin is completely dry before proceeding. Proper preparation ensures better color absorption and a more precise application of the tint.

Preparation Process
Thoroughly clean the brow and lash area with a non-oily cleanser to remove dirt and oils. Apply a thin layer of petroleum jelly around the brows to protect the skin during tinting. Use eye protection papers to shield the delicate under-eye area, ensuring a clean and precise application process. Proper preparation ensures the tint adheres evenly and effectively.
3.1 Gathering Materials and Tools
To begin, collect all necessary materials from the 1000 Hour Eyebrow Tint kit, including the color cream, developer gel, mixing cup, and applicator wand. Additionally, gather cotton pads, petroleum jelly, and protective eye papers to shield the skin around your brows. Ensure you have a clean, non-oily cleanser to prepare the area and a dry cotton pad for removal. Optional items like gloves and a mirror can enhance precision and hygiene. Having all tools ready ensures a smooth and efficient tinting process.
3.2 Cleaning the Brow and Lash Area
Cleanse the brow and lash area thoroughly using a non-oily cleanser to remove any makeup, oils, or impurities. Gently pat dry with a clean towel. Apply a thin layer of petroleum jelly around the brows and underneath the eyes to protect the skin from staining. Ensure the area is completely dry and free of residue before proceeding with the tint application. This step is crucial for optimal color adhesion and even results, ensuring the tint lasts as long as possible without fading unevenly.

Application Steps
Apply the tint mixture to your eyebrows using the provided applicator, working in upward strokes to coat all hairs evenly. Follow the same technique for lashes.
4.1 Mixing the Dye and Developer
Squeeze 2cm of the colour cream into a clean mixing cup. Add the developer gel in the recommended proportion, typically 1:1, and mix until smooth. Use the applicator to blend thoroughly. Apply the mixture to brows or lashes, ensuring even coverage. For lashes, use upward strokes like mascara. Leave on for 2 minutes before gently wiping off with a dry cotton pad. Avoid the eye area and consider applying petroleum jelly around brows as a protective barrier. This step ensures the tint adheres evenly for professional results.
4.2 Applying the Tint to Eyebrows
Using the applicator, apply the tint mixture to your eyebrows in the direction of hair growth. Start at the arch and work towards the tail, ensuring full coverage. Be precise to avoid staining the skin. Use light, even strokes, and fill in sparse areas thoroughly. Leave the tint on for 2 minutes to develop. Avoid overlapping or applying too much product. For a natural look, follow your brow shape closely. Use a cotton swab to clean up any excess tint around the edges before it dries.
4.3 Applying the Tint to Eyelashes
Lie down with your eyes closed and carefully apply the tint to your eyelashes using the white wand or spoolie. Start at the base and move upward, similar to applying mascara. Focus on the bottom lashes by gently brushing in an upward motion. Ensure even coverage without clumping. Leave the tint on for 2 minutes to develop. After processing, remove the tint with a dry cotton pad, wiping from base to tip. Avoid getting the product in your eyes for a safe and successful application.

Processing Time and Removal
Allow the tint to develop for 2 minutes. Gently remove the dye using a dry cotton pad, wiping from the base to the tip of the lashes.
5.1 Waiting Time for the Tint to Develop
After applying the tint, allow it to develop for 2 minutes for the eyebrows and up to 10 minutes for the eyelashes. Timing may vary depending on desired intensity.
Ensure the tint is applied in the direction of hair growth for even coverage. Avoid over-processing, as this can lead to dryness or color that is too dark.
Once the development time is up, gently remove the tint using a damp cotton pad, wiping from the base to the tip of the lashes or brows.

5.2 Removing the Tint Safely
To remove the tint safely, use a damp cotton pad to gently wipe away the dye from your brows or lashes. Start at the base and move toward the tips to avoid spreading the tint.
Avoid rubbing or using harsh products, as this can irritate the skin or cause uneven color removal. If the tint is stubborn, dampen the pad with a small amount of cleanser and wipe again.
After removal, rinse the area with clean water and pat dry. Apply a moisturizer to soothe the skin and prevent dryness.

Post-Application Care
After tinting, avoid water for 24 hours to ensure the color sets properly. Use oil-based products to clean the area instead of wet wipes to maintain results.
Moisturize the brow area to keep it hydrated and prevent dryness, enhancing the longevity of the tint for a fresh, defined look.
6.1 Cleaning Up After Tinting
After tinting, gently remove excess dye using a dry cotton pad. Avoid water for 24 hours to allow the color to set. Use an oil-based cleanser to clean the area without stripping the tint. Apply a small amount of oil, such as coconut oil or makeup remover, to wipe away any residue. Avoid using harsh products or exfoliants near the brow area. Wait at least 24 hours before washing your face or applying makeup to ensure long-lasting results and vibrant color.
6.2 Aftercare Tips for Long-Lasting Results
To maintain vibrant results, avoid water on your brows for 24 hours post-tint. Use oil-based cleansers to clean the area without stripping the tint. Gently apply a small amount of oil, like coconut or jojoba oil, to the brow area to keep it moisturized. Avoid harsh products, exfoliants, or makeup removers near the brows. For touch-ups, wait until the color fades naturally. Regularly applying a brow oil can enhance color retention and keep your brows healthy and defined. Proper aftercare ensures your tint lasts up to 4-6 weeks.

Common Mistakes to Avoid
Avoiding common mistakes ensures better results. Skipping the patch test, applying too much tint, or leaving it on longer than recommended can lead to uneven color or irritation.
7.1 Overlooking the Patch Test
Overlooking the patch test is a critical mistake. It can lead to severe allergic reactions, skin irritation, or discoloration. Always conduct a 48-hour patch test before application to ensure safety and compatibility with your skin. This simple step helps prevent unwanted reactions and guarantees a smooth tinting process. Neglecting it might result in discomfort or unsatisfactory results, making it essential to prioritize this precautionary measure for optimal outcomes with 1000 Hour Eyebrow Tint.
7.2 Incorrect Application Technique
Incorrect application technique can lead to uneven color distribution or skin irritation. Common mistakes include applying too much tint, not following the direction of hair growth, or using the wrong tools. Always use the provided applicator or a clean spoolie, and apply the tint in the direction of brow growth. Over-application can cause the tint to seep outside the brow area, resulting in an unprofessional look. To avoid this, carefully follow the instructions and apply thin, controlled layers. Proper technique ensures precise, natural-looking results with the 1000 Hour Eyebrow Tint.
Troubleshooting
Troubleshooting common issues like uneven color or allergic reactions is essential for achieving desired results. Addressing these problems promptly ensures the best outcome for your eyebrow tinting experience.
8.1 Dealing with Uneven Color
Uneven color can occur due to improper application or inconsistent dye distribution. To fix this, redo the patch test and carefully follow instructions, ensuring even coverage. Avoid over-processing, as it may darken some areas more than others. If unevenness persists, gently remove the tint and reapply, focusing on sparse areas. Using a spoolie to comb through brows during application can help achieve a more uniform result. Always adhere to the recommended processing time to avoid over-tinting certain sections.
8.2 Managing Allergic Reactions
If an allergic reaction occurs, such as redness, itching, or swelling, rinse the area immediately with cold water and gently remove the tint using a mild cleanser. Discontinue use and avoid reapplication. Severe reactions may require medical attention. Always perform the 48-hour patch test to identify sensitivities beforehand. If irritation persists, consider consulting a professional or using hypoallergenic alternatives. Proper preparation and adherence to instructions can minimize the risk of adverse reactions, ensuring a safe and effective tinting experience.
With proper care and application, the 1000 Hour Eyebrow Tint offers salon-quality results at home. Follow instructions carefully for safe, long-lasting, and professional-looking brows and lashes.
9.1 Final Tips for Perfect Results
Achieve professional-looking results by following instructions meticulously. Ensure consistency by carefully mixing the dye and developer. Always perform a patch test, even if you’ve used the product before. For best outcomes, avoid using waterproof makeup nearby and allow the tint to develop fully. After application, gently clean up and moisturize the area. Regular touch-ups every 4-6 weeks will maintain your look. Use high-quality tools and follow a consistent brow care routine for long-lasting, defined brows and lashes.