
ProSelect Thermostat Manual: A Comprehensive Guide
Welcome! This detailed manual guides users through ProSelect thermostat operation, installation, and troubleshooting, ensuring optimal performance and comfort within your home environment.
Ferguson Enterprises, Inc. provides warranties against defects in new PROSELECT thermostats, offering peace of mind alongside reliable temperature control.
ProSelect thermostats represent a commitment to reliable and efficient home climate control. Designed for ease of use and installation, these thermostats cater to both conventional and heat pump systems, offering a versatile solution for diverse heating and cooling needs. Whether you’ve chosen a programmable or non-programmable model – like the PSTSN11AWH – ProSelect prioritizes user-friendly operation.
This manual serves as a comprehensive resource, guiding you through every aspect of your thermostat, from initial setup and configuration, including the Installer Setup (ISU) mode, to daily operation and troubleshooting. Understanding the display icons and available settings empowers you to optimize your comfort and energy savings.
ProSelect thermostats come equipped with features like filter change reminders and adjustable temperature differentials, enhancing both convenience and system performance. Carefully review the safety information before beginning installation to ensure a secure and successful setup.
Understanding ProSelect Models
ProSelect offers a range of thermostat models designed to meet varying homeowner preferences and system requirements. Key distinctions lie in programmability – with both programmable (like the PSTSL11p52) and non-programmable options available. Non-programmable models, such as the PSTSN11AWH, provide simple, consistent temperature control, ideal for those preferring manual adjustments.
Programmable models allow for customized schedules, optimizing comfort and energy efficiency by automatically adjusting temperatures based on your daily routine. Furthermore, ProSelect thermostats are compatible with both conventional heating and cooling systems, as well as heat pump systems. However, specific configurations, like the system switch position, are crucial for proper operation.
Certain models, like the PSTS21P52, are specifically configured for conventional systems; incorrect settings (e.g., EM HEAT position) can trigger display messages like “NO AUX SET”. Always refer to the wiring diagrams appropriate for your system type during installation.
Safety Information and Warnings
Prior to installation and operation, carefully review these crucial safety guidelines. WARNING: Incorrect wiring or handling can lead to electrical shock or damage to the thermostat and connected systems. Always disconnect power at the breaker before commencing any wiring procedures. Ensure the transformer common is not required for battery-only operation, but proper wiring is essential for powered systems.
This thermostat is intended for indoor use only. Do not expose it to direct sunlight, extreme temperatures, or moisture. Installation should be performed by a qualified technician if you are unfamiliar with electrical wiring. Ferguson Enterprises, Inc. is not responsible for damages resulting from improper installation or disregard for safety warnings.
Keep the thermostat and included accessories out of reach of children. Do not attempt to disassemble or repair the thermostat yourself; contact a qualified service professional for assistance. Always read and understand the complete installation instructions before beginning the installation process.
Installation Guide
Begin installation by verifying package contents, mounting the base plate securely, and carefully following the appropriate wiring diagrams for your specific heating or cooling system.
Package Contents Verification
Before commencing installation, it’s crucial to meticulously verify that all necessary components are present within the ProSelect thermostat package. A complete package should include the base plate mounting system, ensuring a secure and stable installation on your wall.
Additionally, confirm the inclusion of appropriate screws and anchors, designed to accommodate various wall types for a robust fit. Two AA batteries are also essential for initial power-up and operation, particularly for models supporting battery-only functionality;
Finally, ensure the package contains the ProSelect thermostat literature, specifically the installation instructions manual – a vital resource for a smooth and successful setup. Confirm you have either the PSTSN11AWH or PSTSN21AWH non-programmable thermostat model, as indicated on the packaging. Carefully inspect all items for any signs of damage before proceeding.
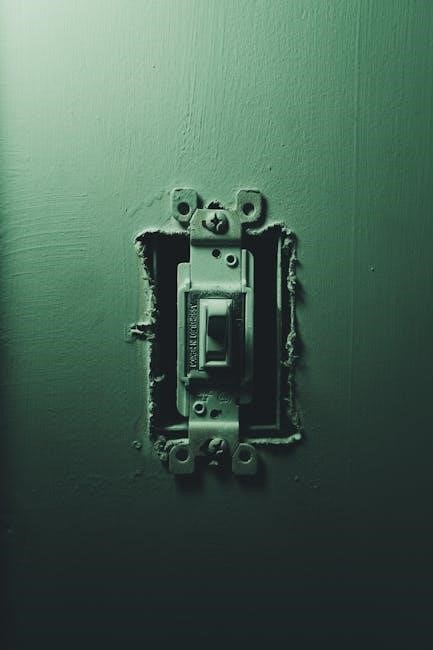
Mounting the Base Plate
Securely mounting the base plate is fundamental to a successful ProSelect thermostat installation. Begin by selecting a suitable location, avoiding areas exposed to direct sunlight or drafts, which can compromise temperature readings.
Utilize the provided screws and anchors, choosing those appropriate for your wall type – drywall, plaster, or wood. Ensure the base plate is level before fully tightening the screws. A level installation guarantees accurate thermostat operation and a professional appearance.
Carefully align the base plate, ensuring sufficient space around it for wiring connections. The mounting system is designed for easy access and secure attachment. Double-check the stability of the base plate after installation; it should not wobble or shift. Proper mounting prevents future issues and ensures long-term reliability.
Wiring Diagrams – Conventional Systems
For conventional heating and cooling systems, precise wiring is crucial for correct operation. Typically, you’ll connect wires labeled R (power), W (heat), Y (cool), and C (common). Always disconnect power at the breaker before commencing any wiring work – safety first!
Refer to the detailed wiring diagram included with your ProSelect model; The diagram illustrates the specific terminal connections for your system configuration. Incorrect wiring can damage the thermostat or your HVAC equipment.
If you have a two-stage heating system, you’ll also have a W2 wire for the second stage. Double-check all connections before restoring power. A properly wired ProSelect thermostat will seamlessly control your conventional system, providing efficient and reliable comfort.
Wiring Diagrams – Heat Pump Systems
Heat pump systems require specific wiring configurations differing from conventional setups. Key terminals include R (power), Y (compressor), W (auxiliary/emergency heat), and C (common). Additionally, a reversing valve wire (O/B) is essential for switching between heating and cooling modes.
Carefully consult the wiring diagram provided with your ProSelect thermostat, as O and B wire designations can vary; Incorrectly identifying these wires can result in reversed heating and cooling. Always disconnect power at the breaker before beginning any wiring procedures.
Ensure secure connections to each terminal. A common wire (C) is often required for consistent power. Proper wiring ensures your ProSelect thermostat effectively manages your heat pump, optimizing energy efficiency and comfort throughout the year. Verify all connections before restoring power.
Battery Installation & Power-Up
ProSelect thermostats often utilize AA batteries for backup power or primary operation, depending on the model. Locate the battery compartment, typically on the front or side of the unit, and open it according to the manual’s instructions. Insert two AA batteries, ensuring correct polarity (+ and -) as indicated inside the compartment.
After battery installation, the thermostat should power up automatically. If it doesn’t, double-check the battery polarity and ensure the batteries are fresh. Some models may require a brief press of a button to initiate power-up. The display should illuminate, indicating successful power-on.
Initial Setup & Configuration
Begin customizing your ProSelect thermostat by accessing the Installer Setup (ISU) mode, setting the correct date and time, and configuring system switches for optimal performance.
Installer Setup (ISU) Mode

Accessing ISU Mode: The ProSelect thermostat automatically enters Installer Setup (ISU) mode upon initial startup, often without requiring any button presses. However, if the ISU mode doesn’t activate automatically, simply press and hold both the MENU and buttons simultaneously for approximately five seconds. This initiates the configuration process, allowing for customized settings tailored to your specific heating and cooling system.
Navigating ISU: Within ISU mode, you can adjust various parameters crucial for proper thermostat operation. These include system type configuration, temperature scale selection, and advanced settings. Use the and buttons to navigate through the different menu options. The display will clearly indicate the current setting and available choices. Remember to save any changes made before exiting ISU mode to ensure they are applied.
Important Note: Incorrect ISU settings can lead to suboptimal system performance or inaccurate temperature readings. If you are unsure about any setting, consult a qualified HVAC technician for assistance. Proper configuration during ISU is essential for maximizing the efficiency and comfort provided by your ProSelect thermostat.
Setting the Date and Time
Accessing Date/Time Settings: Within Installer Setup (ISU) mode, navigate to the date and time setting using the and buttons. The display will highlight the current date, typically presented in a Month/Day/Year (MM/DD/YYYY) format. Press the SELECT button to begin adjusting the date.
Adjusting Date and Time: Use the and buttons to increment or decrement the month, day, and year individually. Once the correct date is set, press SELECT to move to the time setting. The time is displayed in a 12-hour or 24-hour format (HH:MM:SS), depending on your preference. Again, utilize the and buttons to adjust the hour and minute.
Saving Changes: After setting both the date and time accurately, press SELECT one final time to save your changes. The thermostat will then display the updated date and time on the main screen. Accurate date and time settings are crucial for proper scheduling and operation of programmable models.
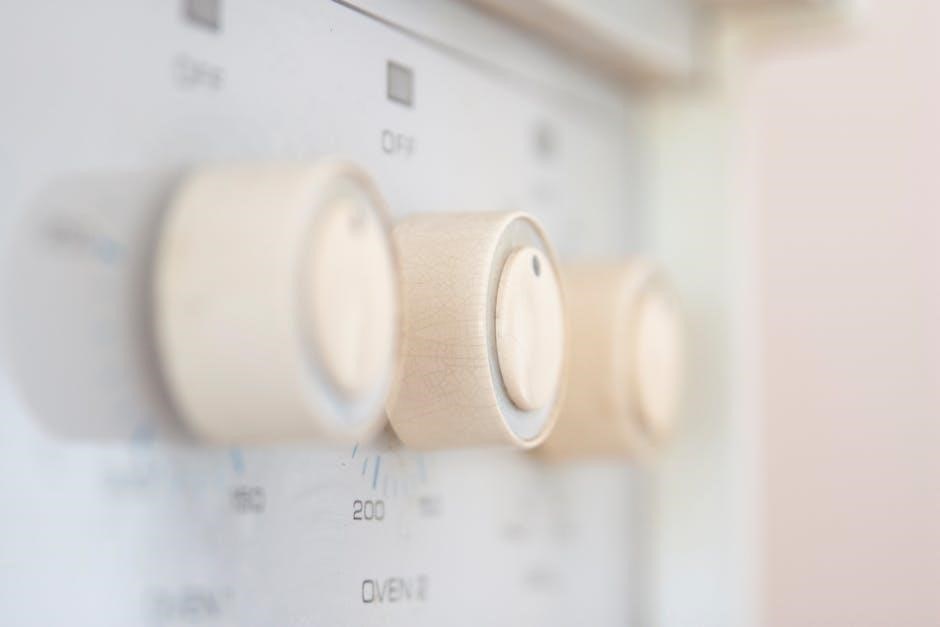
System Switch Configuration (HEAT/EM HEAT)
Understanding the System Switch: Located on the thermostat’s control board, the system switch determines how the thermostat manages heating functions. It offers two primary positions: HEAT and EM HEAT (Emergency Heat). Proper configuration is vital for efficient operation and preventing unwanted display messages.
HEAT Position: The HEAT position is for conventional heating systems, including gas, oil, or electric furnaces. When set to HEAT, the thermostat controls the primary heating source.
EM HEAT Position: The EM HEAT position is specifically for heat pump systems and activates auxiliary or emergency heat. Important Note: If a conventional system is mistakenly configured with the switch in EM HEAT, the display may flash “NO AUX SET,” while still functioning in a two-stage heat mode. To resolve this, simply move the switch back to the HEAT position.
Caution: Incorrect settings can impact heating performance.
Temperature Scale Selection (°F/°C)
Customizing Your Display: The ProSelect thermostat allows users to display temperatures in either Fahrenheit (°F) or Celsius (°C), catering to personal preference and regional standards. This setting doesn’t affect the thermostat’s operational functionality, only the temperature units shown on the display.
Accessing the Setting: During the initial setup or through the thermostat’s menu, you can navigate to the temperature scale selection option. The exact menu path may vary slightly depending on the specific ProSelect model, but it’s generally found within the ‘Settings’ or ‘Configuration’ section.
Switching Between Scales: Once located, simply select your desired temperature scale – either °F or °C. The thermostat will immediately update the display to reflect the chosen unit. This change is typically saved automatically and persists until altered again.
Operating Your ProSelect Thermostat
Effortless Control: This section details how to effectively utilize your ProSelect thermostat, covering display interpretations, manual adjustments, scheduling, and fan operation.
Understanding the Display Icons
Decoding the Display: Your ProSelect thermostat’s display utilizes a series of icons to communicate system status and operational mode. Familiarizing yourself with these symbols is crucial for effective control and troubleshooting. A flame icon indicates the heating system is actively engaged, providing warmth. Conversely, a snowflake icon signifies the cooling system is running, delivering refreshing air.
The fan icon displays the fan’s operational setting – ‘AUTO’ for automatic cycling with heating/cooling, or ‘ON’ for continuous airflow. A battery icon alerts you to low battery levels, prompting replacement for uninterrupted operation. If you observe a flashing “NO AUX SET” message, it suggests a configuration issue, potentially with the system switch set incorrectly for conventional systems.
Other icons may indicate specific modes like emergency heat or system errors, requiring further investigation. Refer to the complete manual for a comprehensive list and detailed explanations of each icon, ensuring you can confidently interpret your thermostat’s feedback and maintain a comfortable indoor climate.
Manual Mode Operation
Direct Control: Manual mode allows for immediate and direct control of your heating and cooling system, overriding any programmed schedules. To activate manual mode, typically you’ll use the ‘MODE’ button to select ‘HEAT’ or ‘COOL’ depending on your desired outcome. Then, utilize the up and down arrow buttons to set your preferred temperature. The thermostat will maintain this setpoint until you either switch modes or return to a programmed schedule.
This mode is ideal for temporary adjustments, unexpected weather changes, or when occupancy patterns deviate from the norm. Remember that in manual mode, the thermostat won’t automatically adjust based on pre-set times. It will consistently strive to maintain the temperature you’ve manually selected.
To return to scheduled operation, simply select ‘AUTO’ mode, and the thermostat will resume following the programmed settings. This provides flexibility and convenience, allowing you to balance automated comfort with on-demand control.
Programming Schedules (Programmable Models)
Customized Comfort: Programmable ProSelect thermostats offer the ability to create customized heating and cooling schedules, optimizing comfort and energy savings; Access the programming mode typically through the ‘MENU’ button, navigating to the ‘SCHEDULE’ option. You can then define different temperature setpoints for various times of the day and days of the week.
Common scheduling options include ‘Wake,’ ‘Leave,’ ‘Return,’ and ‘Sleep’ periods, allowing you to tailor temperatures to your daily routine. Each period can be assigned a specific temperature and start time. Remember to save your changes after making adjustments to the schedule.
Utilizing schedules effectively reduces energy consumption by automatically lowering temperatures when the space is unoccupied or during sleep hours. Review and adjust your schedule periodically to ensure it aligns with your lifestyle and maximizes efficiency.
Fan Control Settings (AUTO/ON)
Optimizing Air Circulation: Your ProSelect thermostat provides two primary fan control settings: ‘AUTO’ and ‘ON’. The ‘AUTO’ setting operates the fan only during heating or cooling cycles, promoting energy efficiency and quieter operation when consistent air circulation isn’t needed. This is the recommended setting for most users.
Selecting ‘ON’ forces the fan to run continuously, regardless of whether the heating or cooling system is active. Continuous fan operation can improve air mixing, distribute temperatures more evenly throughout the space, and provide continuous air filtration.
However, be aware that the ‘ON’ setting will consume more energy due to the fan’s constant operation. To change the fan setting, access the ‘FAN’ option within the thermostat’s menu, typically navigated using the ‘MENU’ and arrow buttons. Choose the setting that best suits your comfort preferences and energy-saving goals.
Troubleshooting Common Issues
Addressing Problems: This section provides solutions for typical ProSelect thermostat issues, including flashing displays, power failures, inaccurate readings, and communication errors.
Display Flashing “NO AUX SET”
Understanding the Error: A flashing “NO AUX SET” message on your ProSelect thermostat, specifically model PSTS21P52, indicates a configuration mismatch between the thermostat settings and your heating system type.
Potential Cause: This typically occurs when the thermostat is configured for a conventional heating system, but the system switch is incorrectly set to the “EM HEAT” (Emergency Heat) position. While the unit will still operate in a conventional two-stage heat mode, the display will persistently flash this warning message.
Simple Solution: To resolve this issue, carefully locate the system switch on your thermostat. Gently move the switch from the “EM HEAT” position back to the “HEAT” position. This will correctly align the thermostat’s configuration with your heating system, and the “NO AUX SET” flashing should cease.
Important Note: Ensure the switch is firmly set in the correct position. If the problem persists after this adjustment, consult a qualified HVAC technician for further assistance.
Thermostat Not Powering On
Initial Checks: If your ProSelect thermostat fails to power on, begin with the simplest solutions. First, verify that the thermostat is securely mounted to the base plate, ensuring a solid electrical connection. Then, confirm that the power supply to your heating and cooling system is active.
Battery Inspection: ProSelect thermostats can operate on battery power alone. If relying on batteries, check the condition of the two AA batteries installed. Replace them with fresh batteries, ensuring correct polarity (+ and -). Even if connected to a power source, weak batteries can prevent operation.
Wiring Verification: If the thermostat is wired, carefully inspect the wiring connections at both the thermostat and the furnace/air handler. Ensure all wires are securely connected to the correct terminals. A loose or incorrect wire can interrupt power.
Professional Assistance: If these steps don’t resolve the issue, consult a qualified HVAC technician to diagnose potential problems with your system’s power supply or thermostat wiring.
Incorrect Temperature Readings
Location Considerations: Ensure your ProSelect thermostat isn’t exposed to direct sunlight, drafts, or heat-generating appliances. These factors can significantly skew temperature readings, leading to inaccurate control of your heating and cooling system. Optimal placement is on an interior wall, away from these influences.
Calibration Check: While ProSelect thermostats are generally accurate, occasional discrepancies can occur. Check if the thermostat offers a temperature offset or calibration feature within the installer setup (ISU) mode. This allows you to adjust the displayed temperature to match a trusted external thermometer.
Sensor Integrity: If calibration doesn’t resolve the issue, the internal temperature sensor might be faulty. Contact a qualified HVAC technician to inspect and potentially replace the sensor.
Airflow Obstruction: Verify that nothing is blocking airflow around the thermostat. Proper air circulation is crucial for accurate temperature sensing. Ensure vents aren’t directed at the thermostat, and furniture isn’t obstructing it.
Communication Errors (if applicable)
System Compatibility: If your ProSelect thermostat communicates with other system components (like a remote sensor or a smart home hub), ensure full compatibility. Refer to the thermostat’s specifications and the documentation of the connected devices for supported protocols and configurations.
Wiring Verification: Double-check all wiring connections, particularly the communication wires (often labeled ‘C’ or ‘COM’). Loose or incorrectly connected wires can disrupt communication. Ensure wires are securely fastened to the terminals.
Signal Interference: Wireless communication can be susceptible to interference from other electronic devices. Try relocating the thermostat or the receiving device to minimize potential interference sources.
Reset & Re-Pair: Attempt a reset of both the thermostat and the connected device. Then, follow the manufacturer’s instructions to re-pair them. This often resolves temporary communication glitches. If issues persist, consult a professional.

Advanced Features & Settings
Customize your ProSelect experience! Explore filter change reminders, temperature differential adjustments, backlight controls, and factory reset options for personalized comfort and optimal system performance;
Filter Change Reminders
Maintaining optimal air quality and system efficiency is crucial, and your ProSelect thermostat can assist with timely filter replacements. This feature proactively reminds you when it’s time to change your air filter, preventing reduced airflow and potential system strain.
To enable or adjust the filter change reminder settings, navigate through the thermostat’s menu options. Typically, you’ll find this under “Advanced Settings” or a similar category. You can then customize the reminder frequency based on your filter type and usage – options often include monthly, quarterly, or a custom interval.
The thermostat will display a visual notification when a filter change is due, ensuring you don’t overlook this important maintenance task. Regularly changing your filter contributes to cleaner air, lower energy bills, and a longer lifespan for your HVAC system. Ignoring this reminder can lead to decreased efficiency and potentially costly repairs.
Remember to consult your HVAC system’s documentation for the recommended filter type and replacement schedule.
Temperature Differential Adjustment
The temperature differential setting controls the difference between the thermostat’s call for heating or cooling and when the system actually turns on or off. Adjusting this setting can optimize comfort and energy efficiency. A smaller differential means the system cycles more frequently, maintaining a more consistent temperature, but potentially increasing wear and tear.

Access this setting through the “Advanced Settings” menu on your ProSelect thermostat. The typical range for adjustment is between 0.5°F and 3.0°F. A lower differential (e.g., 1°F) is suitable for homes where consistent temperature is paramount, while a higher differential (e.g., 3°F) can reduce energy consumption and system cycling.
Experimenting with different settings allows you to find the optimal balance for your home and comfort preferences. Be mindful that excessively small differentials can lead to short cycling, reducing system efficiency and lifespan. Consult an HVAC professional if you’re unsure about the appropriate setting for your specific system.
Proper adjustment ensures both comfort and energy savings.
Backlight Control
The ProSelect thermostat features adjustable backlight settings to enhance visibility in low-light conditions. Access the backlight control options through the “Advanced Settings” menu on your device. You can typically customize both the brightness level and the duration for which the backlight remains illuminated after button presses.
Brightness levels usually range from off to several levels of intensity, allowing you to tailor the display to your preference and minimize light disturbance during nighttime hours. The backlight duration setting determines how long the display remains lit after you interact with the thermostat, ranging from a few seconds to always on.
Selecting “Always On” will consume more battery power, if applicable, but provides constant visibility. Adjusting these settings allows for a personalized user experience, balancing convenience with energy conservation. Experiment to find the optimal settings for your viewing comfort and energy-saving goals.
Customization ensures optimal visibility and energy efficiency.
Resetting to Factory Defaults
Returning your ProSelect thermostat to its factory default settings erases all personalized configurations, including schedules, temperature preferences, and network connections. This is useful for troubleshooting persistent issues or preparing the thermostat for a new user. The reset procedure typically involves navigating to the “Advanced Settings” menu on the device.
Within the advanced settings, locate the “Reset” or “Factory Reset” option. Be aware that this action is irreversible, and you will need to reconfigure the thermostat entirely after the reset is complete. The thermostat may prompt you for confirmation before initiating the reset process to prevent accidental data loss.
After the reset, the thermostat will revert to its original out-of-the-box state, requiring you to repeat the initial setup process, including date/time configuration and system type selection. This ensures a clean slate for optimal performance and customization.

Proceed with caution, as all settings will be lost during this process.